

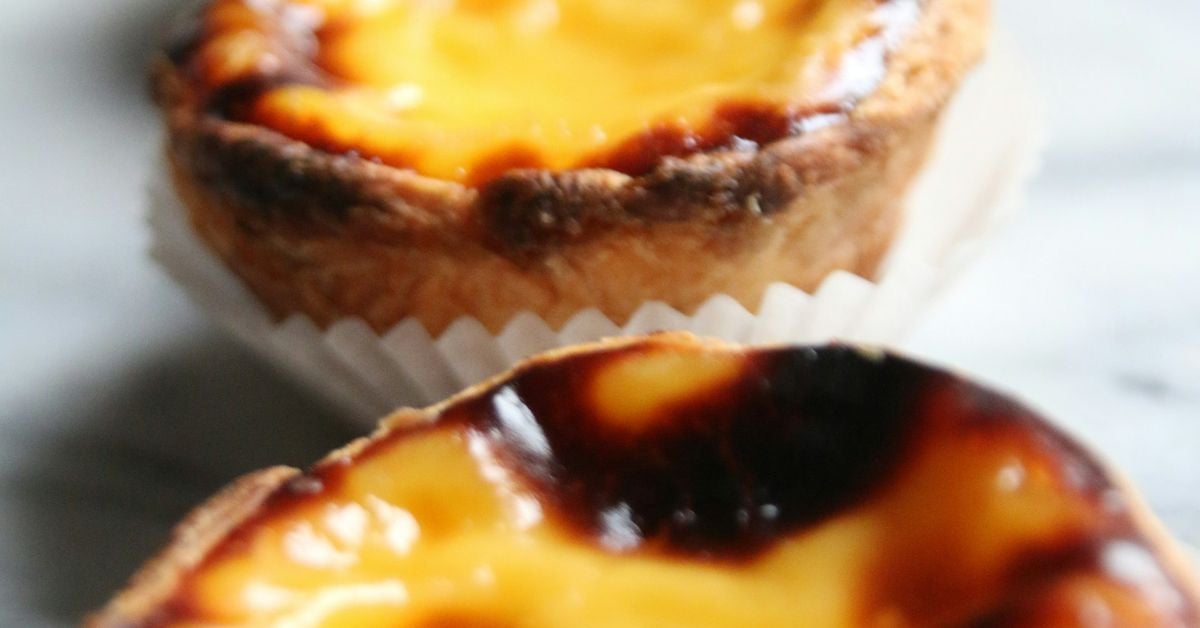
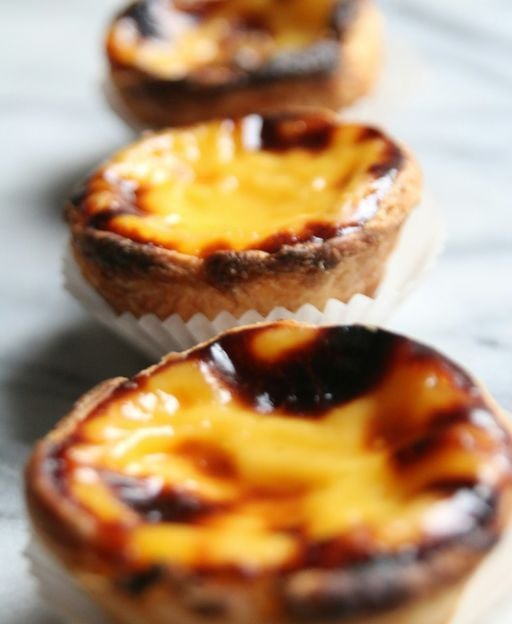
Some recipes live rent-free in your head long after you first taste them. Pastéis de nata are exactly that — those impossibly flaky, slightly warm Portuguese custard tarts with dark caramelised spots on top. Chris from The Irish Baker Abroad has perfected them. This recipe makes 12 at home.
These tarts have an unusual origin story. They were created by Catholic monks at the Jerónimos Monastery in Lisbon in the 18th century. The monks used egg whites to starch their habits. The leftover yolks became pastéis de nata. When the monastery closed in 1820, the recipe was sold to a nearby sugar refinery. That bakery — Pastéis de Belém — still operates today and sells thousands every day.
You’ll find them across Ireland too, in every good Portuguese café and deli. But making them yourself is deeply satisfying. The laminated pastry takes time. The custard is simple. The result is extraordinary.
What Makes Pastéis de Nata Special
The magic is in the contrast. The pastry is shatteringly crisp. The custard inside is silky and just set. The dark, almost burnt spots on top aren’t a mistake — they’re essential. That caramelisation adds bitterness that balances the sweet custard perfectly.
Chris uses rough puff pastry rather than full puff. It’s faster. You get 4 turns instead of 6. The layers are still beautiful. The pastry cooks to a deep golden brown with distinct flaky layers visible at the rim of each tart.
The custard uses a sugar syrup rather than a simple sugar addition. This gives it a slightly different texture — glossy and smooth, with a gentle wobble when the tarts first come out of the oven. Cinnamon and lemon peel infuse the syrup. The flavour is delicate but unmistakable.
If you enjoy making pastry from scratch, you’ll also love Chris’s Classic Lemon Tart and his Rhubarb and Almond Frangipane Tart, both of which use similar pastry-making techniques.
Ingredients
For the Rough Puff Pastry
- 300g strong white bread flour
- 200g cold water
- 5g salt
- 200g cold unsalted butter (82% fat content)
For the Custard
- 150g granulated sugar
- 75g water
- 20g cornflour (cornstarch)
- 250g full-fat milk (cold)
- 5 egg yolks
- 1 cinnamon stick
- 1 strip lemon peel (from half a lemon)
- A touch of vanilla extract (optional)
Method
Step 1: Make the Rough Puff Pastry Dough
Place the flour in a large bowl. Add the salt. Mix together. Pour in the cold water. Combine with your hands until a rough dough forms. Don’t knead it. Don’t worry about smoothness. Cover the bowl and rest at room temperature for 30 minutes.
While the dough rests, prepare your butter block. Slice the butter into 1cm-thick slices. Arrange them on baking paper in a 15x15cm square. Place another sheet of paper on top. Use a rolling pin to flatten to a 20x20cm rectangle. Refrigerate until firm.
Step 2: Laminate the Pastry
Flour your surface lightly. Roll the rested dough to a 20x20cm square, about 5-6mm thick. Remove the butter from the fridge. Place it diagonally in the centre of the dough. Fold the four dough corners over the butter to meet in the middle. Pinch the seams firmly. The butter is now enclosed.
Roll out to a 50x20cm rectangle. Fold the bottom third up. Fold the top third down. This is one turn. Rotate 90 degrees. Repeat. Wrap in cling film and refrigerate for 30 minutes.
Repeat this process twice more — two additional turns, with a 30-minute chill between each. You’ll do 4 turns in total. After the final turn, wrap tightly and refrigerate for at least 1 hour, or overnight if possible.
The extended chilling is important. It relaxes the gluten. It keeps the butter cold. Both lead to better layers in the finished tarts.
Step 3: Make the Custard
Place the sugar, 75g water, lemon peel, and cinnamon stick in a saucepan. Bring to a boil over medium heat, stirring to dissolve the sugar. Remove from the heat. Allow to cool slightly — warm, not hot.
Whisk the cornflour into the cold milk until completely smooth. Add the 5 egg yolks. Whisk together. Remove the cinnamon stick and lemon peel from the syrup. Slowly pour the warm syrup into the milk and egg mixture, whisking constantly. This tempers the yolks. Add a touch of vanilla if using.
Pour the mixture into a clean saucepan. Cook over medium-low heat, stirring constantly. The custard thickens as it cooks. Keep stirring. It’s ready when it coats the back of a spoon.
Strain through a fine sieve into a clean bowl. Cover directly with cling film — press it onto the surface to prevent a skin forming. Refrigerate until completely cold, at least 1 hour.
Step 4: Assemble the Tarts
Preheat your oven to 250°C (conventional) or 220°C (fan). High heat is essential. It’s what creates the crispy pastry and dark caramelised spots.
Flour your surface. Roll the chilled pastry into a large rectangle, about 3-4mm thick. Trim the edges straight. The rectangle should be roughly 60x20cm. Take a small piece from one short end and roll it into a tight cylinder. Place it at one end of the long rectangle. Roll the entire sheet up tightly from that end, incorporating the cylinder as a core. You now have a tight log.
Trim 1cm off each end. Slice into 12 equal rounds, each about 2.5cm thick.
Take each round and place it cut-side down on a floured surface. Press flat with your palm. The spiral pattern should be visible from above. Use your thumbs to press the centre down and push the dough outwards and up the sides of the tart mould. Aim for a very thin, even layer. It should extend slightly over the rim. Patch any tears.
Step 5: Fill and Bake
Fill each pastry-lined mould with cooled custard — about 80-90% full. Place on a baking tray. Bake for 12-15 minutes. The pastry turns deep golden. The custard puffs up and develops dark, caramelised spots.
Remove from the oven. Cool in the moulds for 5-10 minutes. Unmould carefully and transfer to a wire rack. Serve warm for the best experience.
Tips from Chris
- Butter fat content matters. Use butter with 82% fat. Higher fat gives better flakiness and more defined layers.
- Keep everything cold. Warm butter melts into the dough and you lose the layers. If the dough feels soft and greasy during rolling, chill it immediately.
- Don’t worry about the dark spots. They’re not burnt. They’re essential. That caramelisation is authentic and adds depth.
- Thin pastry is the goal. Press it into the moulds as thinly as possible. Thick pastry doesn’t cook through properly at the base.
- Strain the custard. Even a well-made custard can have tiny lumps. The sieve guarantees silk-smooth results.
- Chill the custard completely. Warm custard puffs unevenly during baking. Cold custard bakes consistently.
How to Serve Pastéis de Nata
In Lisbon, pastéis de nata are eaten warm, dusted with a little icing sugar and cinnamon. That’s the traditional way. Try it — it’s simple and perfect.
They’re also wonderful with strong espresso or a flat white. The slight bitterness of the coffee offsets the sweet custard. It’s one of those food-and-drink pairings that just makes sense.
If you enjoy baking with pastry, Chris’s Bakewell Tart uses a similar press-in pastry technique and is another crowd-pleaser. For something lighter, his Classic Lemon Meringue Pie delivers big flavour with a simple crisp shell.
Watch Chris Make It
Watch the full video below for every technique shown in detail — from the butter lamination to the pastry-pressing method that gives these tarts their characteristic shape.
☘️ You Might Also Love
☘️ Join 65,000+ Ireland Lovers
Every Friday, get Ireland’s hidden gems, local secrets, and travel inspiration — the kind you won’t find in any guidebook.
Subscribe free — enter your email:
Already subscribed? Download your free Ireland guide (PDF)
Love more? Join 43,000 Scotland lovers → · Join 30,000 Italy lovers → · Join 7,000 France lovers →
Free forever · · Unsubscribe anytime
Frequently Asked Questions
What is the difference between pastéis de nata and custard tarts?
Pastéis de nata are the Portuguese version of custard tarts. They use a laminated puff pastry shell rather than shortcrust. The custard is made with a sugar syrup and flavoured with cinnamon and lemon peel. The baking temperature is much higher — 250°C — which creates the characteristic dark, caramelised spots that distinguish them from British-style custard tarts.
Can I use shop-bought puff pastry for pastéis de nata?
Yes, you can use ready-made all-butter puff pastry. It saves considerable time. The result won’t be identical — homemade laminated pastry has slightly more defined layers and a crispier texture — but shop-bought works well for a weeknight bake. Roll it to 3-4mm, form the log, and proceed as directed.
How long do pastéis de nata keep?
Pastéis de nata are best eaten on the day they’re made. The pastry softens as it sits. If you need to store them, keep in an airtight container for up to 2 days. Reheat in an oven at 180°C for 5 minutes to crisp the pastry before serving. Don’t microwave them — you’ll lose the pastry texture entirely.
Why do my pastéis de nata not have dark spots?
The dark caramelised spots require very high heat. Make sure your oven is fully preheated to 250°C (conventional) or 220°C (fan) before the tarts go in. If your oven runs cool, increase the temperature slightly. The tarts need 12-15 minutes at full heat to caramelise properly. An oven thermometer helps if you’re unsure.
More Baking from The Irish Baker Abroad
Chris has been sharing traditional and European baking recipes with an Irish audience for years. His Hot Cross Buns recipe is one of the most popular on the site. His Cantucci Biscotti show the same love of European baking traditions. And for a slice of pure Irish comfort, his Bread and Butter Pudding is exactly what a rainy evening calls for.
These pastéis de nata take time — that’s honest. But the lamination process is meditative once you get into it. And the moment those little tarts come out of a very hot oven, golden and caramelised and smelling extraordinary, you’ll understand completely why they’ve been made the same way for over 200 years.
Tours & experiences you might love


Powered by Viator. Some links are affiliate links — we may earn a small commission at no extra cost to you.
Secure Your Dream Irish Experience Before It’s Gone!
Planning a trip to Ireland? Don’t let sold-out tours or packed attractions spoil your journey. Iconic experiences like visiting the Cliffs of Moher, exploring the Rock of Cashel, or enjoying a guided walk through Ireland’s ancient past often sell out quickly—especially during peak travel seasons.

Booking in advance guarantees your place and ensures you can fully immerse yourself in the rich culture and breathtaking scenery without stress or disappointment. You’ll also free up time to explore Ireland’s hidden gems and savour those authentic moments that make your trip truly special.
Make the most of your journey—start planning today and secure those must-do experiences before they’re gone!
Subscribe Free