

Iowa State Horticultural Society via Wikimedia Commons (Public domain)
Potato Farl Recipe: The Soft Griddle Bread at the Heart of the Ulster Fry
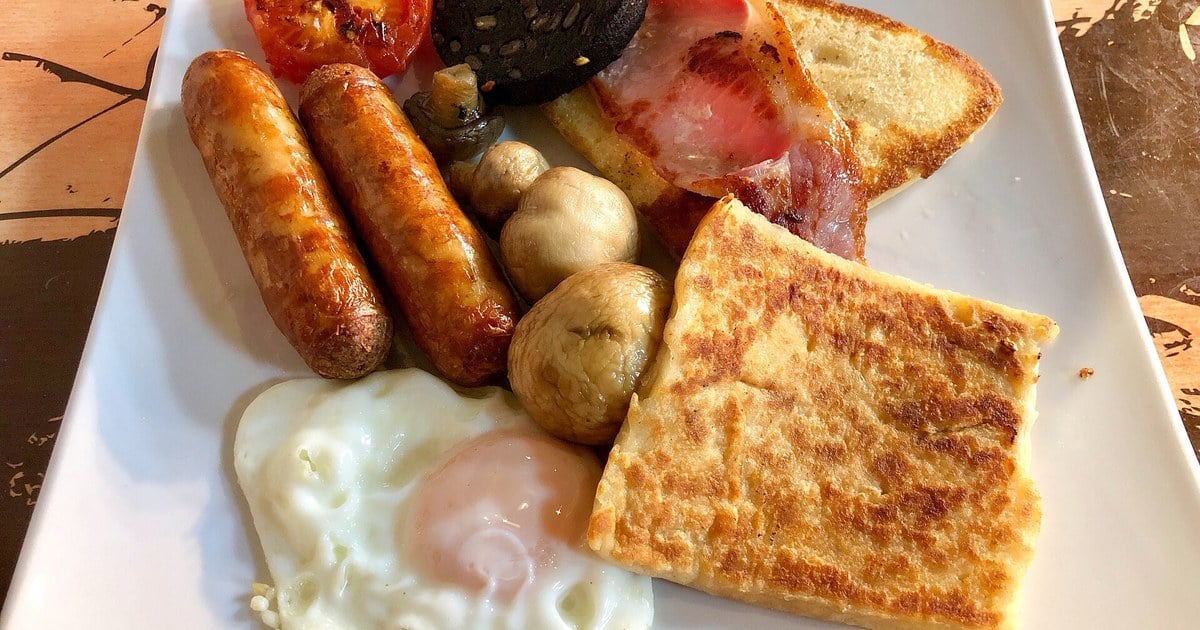
If you’ve ever sat down to a proper Ulster fry in a Northern Irish café or farmhouse kitchen, chances are there was a golden, slightly crisp square of potato bread sitting proudly on your plate. That’s the potato farl — and once you’ve had one fresh from a hot griddle, you’ll understand why people from this part of the world get quietly passionate about them. The word farl comes from the Scottish Gaelic fardel, meaning a fourth part, and describes the way the round of dough is cut into four triangular quarters before cooking. Simple, practical, and utterly delicious.
Potato farls have their roots deep in Irish rural life, born from a time when the potato was the cornerstone of the Irish diet and nothing — absolutely nothing — was wasted. Leftover mashed potato from the previous day’s dinner would be mixed with a little flour, shaped on the griddle, and served the next morning. It was thrifty, it was filling, and it made extraordinary use of humble ingredients. In Ulster in particular, the farl became embedded in the morning routine, cooked on a cast-iron griddle over a turf fire and eaten with butter or alongside bacon and eggs.
Today, potato farls are sold in every supermarket across Northern Ireland and are standard issue on any self-respecting Irish breakfast plate. But the shop-bought versions, good as they are, have nothing on homemade. Making your own takes less than half an hour from start to finish, and the results — soft and fluffy inside, with a lightly golden crust — are streets ahead of anything in a packet. The key is to use floury potatoes and to handle the dough as lightly as possible. Here’s how to do it properly.
Ingredients
- 450g (1 lb) floury potatoes, such as Maris Piper, Kerr’s Pink, or Roosters, peeled and cut into chunks
- 100g (3½ oz / ¾ cup) plain flour, plus extra for dusting
- 1 teaspoon baking powder
- ½ teaspoon fine salt
- 25g (1 oz / 2 tablespoons) salted butter, softened
- A little butter or neutral oil for frying
Method
- Boil the potatoes in well-salted water until completely tender, about 15–20 minutes. Drain thoroughly and leave them in the colander for a couple of minutes to steam dry — this step matters, as excess moisture will make your dough sticky and heavy.
- While the potatoes are still hot, mash them very smoothly. You want no lumps at all. A ricer gives the best result here, but a good old-fashioned masher works perfectly well provided you’re thorough. Stir in the butter until it melts evenly through the mash.
- Sift together the flour, baking powder, and salt into the warm mash. Mix gently with a wooden spoon or your hands until a soft dough comes together. It will feel a little tacky — that’s fine. Do not overwork it.
- Turn the dough out onto a lightly floured surface and pat it gently into a round roughly 20–22cm (8 inches) in diameter and about 1cm (½ inch) thick. Again, treat it lightly. A rolling pin can be used but your hands give you better feel for the dough.
- Using a sharp knife or a bench scraper, cut the round into four equal triangles — your farls.
- Heat a dry griddle pan, a cast-iron skillet, or a heavy non-stick frying pan over a medium heat. You want the pan properly hot before the farls go in, but not scorching. A drop of water should evaporate quickly on the surface.
- Cook the farls in the dry pan (no oil at this stage) for about 4–5 minutes per side, until they develop a pale golden-brown crust and the dough looks cooked through at the edges. They should puff slightly and feel set when pressed lightly in the centre.
- At this point you have a perfectly good potato farl ready to eat with butter. But for the full fry-up experience, allow them to cool slightly, then fry them in a little butter or oil in the same pan over a medium-high heat for 2–3 minutes per side until they are properly golden and a little crisp on the outside. That contrast of crust and soft interior is what makes them so irresistible.
Tips
- Floury varieties of potato give the lightest, fluffiest result. Waxy potatoes produce a dense, gluey dough that won’t cook as well.
- Getting the potatoes as dry as possible before mashing makes the single biggest difference to the texture of the finished farl.
- Uncooked farls can be stored between sheets of greaseproof paper in the fridge for up to 24 hours, making them an excellent make-ahead option for a leisurely weekend breakfast.
- Leftover cooked farls reheat beautifully in a hot buttered pan — give them 2 minutes a side and they’ll crisp up just as nicely as fresh.
- The dough should be soft and just slightly sticky. If it’s unmanageably wet, add flour one tablespoon at a time, but be sparing — too much flour makes a tough farl.
There is something genuinely comforting about making potato farls from scratch — the warm smell of potato and butter in the kitchen, the soft dough giving under your palms, the sizzle as they hit the hot pan. They connect you, however briefly, to generations of Irish cooks who made something wonderful from almost nothing, and they remind you that the best food so often does exactly that. Serve them golden and steaming alongside your bacon, eggs, sausages, and soda bread, and you’ll have the full picture of what an Irish breakfast is truly meant to be.
☘️ Join 64,000+ Ireland Lovers
Every weekday morning, get Ireland’s hidden gems, local secrets, and travel inspiration — the kind you won’t find in any guidebook.
Subscribe free — enter your email:
Already subscribed? Download your free Ireland guide (PDF)
📲 Know someone who’d love this? Share on WhatsApp →
Love more? Join 43,000 Scotland lovers → · Join 29,000 Italy lovers → · Join 7,000 France lovers →
Free forever · Unsubscribe anytime
Thinking about it seriously?
If you’ve started actually planning a move, our complete the full Move to Ireland guide walks through every step, every cost, and the paperwork that catches most people out.
Tours & experiences you might love


Powered by Viator. Some links are affiliate links — we may earn a small commission at no extra cost to you.
Secure Your Dream Irish Experience Before It’s Gone!
Planning a trip to Ireland? Don’t let sold-out tours or packed attractions spoil your journey. Iconic experiences like visiting the Cliffs of Moher, exploring the Rock of Cashel, or enjoying a guided walk through Ireland’s ancient past often sell out quickly—especially during peak travel seasons.

Booking in advance guarantees your place and ensures you can fully immerse yourself in the rich culture and breathtaking scenery without stress or disappointment. You’ll also free up time to explore Ireland’s hidden gems and savour those authentic moments that make your trip truly special.
Make the most of your journey—start planning today and secure those must-do experiences before they’re gone!
Subscribe Free