

There is something deeply comforting about the smell of fresh bread filling a home kitchen, and Dublin Turnover Bread delivers that pleasure in the most honest, unfussy way imaginable. This is the bread that generations of Irish families grew up with — a soft, pillowy white loaf with a floury top and those unmistakeable finger-poked sections that pull apart with ease. Chris from The Irish Baker Abroad has brought this beloved bakery classic into the home kitchen with a brilliant no-knead method that makes it more accessible than ever before.
What Is Dublin Turnover Bread?
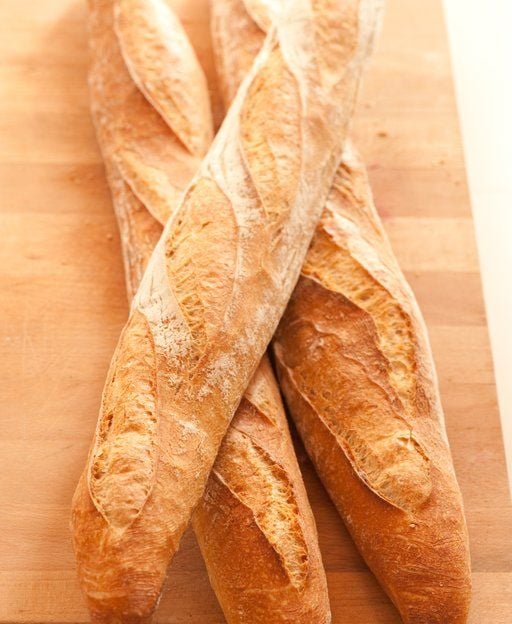
Dublin Turnover Bread is a distinctly Irish white tin loaf that has been a staple of bakeries across Dublin and the surrounding counties for well over a century. Its name comes from the traditional method of shaping: the dough is stretched, folded, and then turned over into the baking tin, giving it a characteristic dense, rounded top. The defining feature is the deep finger indentations pressed along the surface before the final proof — these create the iconic sections that make the loaf so recognisable and so easy to tear apart at the table.
Unlike soda bread, which uses bicarbonate of soda as a raising agent, turnover bread is a yeasted loaf with a soft, slightly chewy crumb. It was historically the bread you would find stacked high in the windows of Dublin city bakeries, still warm from the oven, and it remains beloved by anyone who grew up in the capital. If you enjoy traditional Irish batch loaf, you will find turnover bread to be a close cousin — equally comforting, equally versatile at the table.
Why This No-Knead Method Is a Game Changer
Traditional bread making can feel intimidating for newer bakers. The kneading process — working the dough for ten or fifteen minutes to develop the gluten structure — requires both technique and effort. Chris’s approach sidesteps this entirely by using a simple stretch-and-fold method during the initial rise. The result is the same beautifully open crumb and soft texture you would expect from a properly kneaded dough, but without any of the arm ache.
The science behind this is straightforward: gluten development happens over time, not just through mechanical action. By allowing the dough to rest and then gently stretching and folding it back on itself, you achieve the same structural result as kneading but at a much more relaxed pace. This makes Dublin Turnover Bread an ideal weekend baking project — you can start it in the morning, potter about the house during the rises, and have fresh loaves ready for lunch. Chris’s recipe yields three loaves baked together in one large tin, which means you will have plenty to share — or to freeze for the week ahead.
For more ideas on Irish baking, you might also enjoy our guides on traditional Irish soda bread and Chris’s own soda bread recipe — both perfect companions to a proper Irish breakfast.
Dublin Turnover Bread Recipe
☘️ Love Irish Food & Culture?
Every Wednesday, we send our best Irish recipes, food stories, and kitchen traditions straight to your inbox. Join 64,000+ readers who love Ireland.
Ingredients
- 700 ml lukewarm water
- 1,200 g strong white bread flour
- 12 g instant dry yeast
- 3 teaspoons salt
- 2½ teaspoons sugar (optional, for colour)
- 60 g melted butter
Makes: 3 loaves, baked together in one large rectangular tin
Prep time: 20 minutes active + 1 hour 30 minutes resting
Bake time: 25–30 minutes
Method
- Combine the ingredients. In a large mixing bowl, add the lukewarm water, strong bread flour, instant dry yeast, salt, optional sugar, and melted butter. Mix thoroughly with a wooden spoon first, then use your hands to bring everything together until no dry flour remains. Do not knead at this stage — just ensure everything is well incorporated.
- First rise. Cover the bowl with a clean tea towel and set it in a warm spot. Leave to rest for 30 minutes.
- Stretch and fold. After 30 minutes, wet your hands lightly with water. Reach into the bowl and pull a portion of dough up from the side, stretching it gently upwards before pressing it down into the centre. Rotate the bowl and repeat this motion around all sides of the dough — about 3 to 4 times in total. This develops the gluten without traditional kneading.
- Second rest. Cover again with the tea towel and leave the dough to rest for a further 30 minutes.
- Knock back and divide. Turn the dough out onto a clean work surface and gently press down to knock out the air. Using a knife or dough scraper, divide the dough into three equal portions.
- Initial shaping. Take one portion and flatten it into a rough rectangle with your fingers. Fold the two long sides into the centre, pressing firmly, then fold the two shorter ends in. Using cupped hands, roll the dough into an even log shape, sealing the seam underneath. Repeat for the remaining two portions.
- Rest the shaped dough. Cover the three logs with a tea towel and leave to rest on the counter for 10 minutes. This relaxes the gluten and makes the next shaping step easier.
- Final shaping — the turnover. Lightly flour your surface. Take one log and flatten it gently to knock out any remaining air, then stretch it out lengthways to roughly twice its original length. Fold both ends into the centre, then fold the whole piece in half lengthwise to create a compact, thick rectangle. This is the turnover fold that gives the bread its name.
- Poke the top. Using four fingers pressed together, make deep, even indentations along the top surface of each shaped piece. These pockets are the hallmark of a classic Dublin Turnover — they give the bread its distinctive appearance and create natural tear lines once baked. Repeat for all three pieces.
- Tin and prove. Place the three shaped pieces side by side in a large, ungreased rectangular baking tin. Cover with a tea towel and leave to prove until the dough has doubled in size and just reaches the top of the tin — usually 30 to 60 minutes depending on the warmth of your kitchen.
- Preheat and prepare for steam. Preheat your oven to 220°C (200°C fan / 430°F / Gas 7). Place an empty roasting tray on the bottom shelf of the oven as it heats up. When ready to bake, pour a cup of boiling water into the hot tray to create steam — this is key for a good crust and soft crumb.
- Dust and bake. Lightly dust the top of the proved dough with flour — this gives it that classic turnover appearance. Slide the tin into the oven and bake for 25 to 30 minutes, until the loaves are deeply golden brown on top and sound hollow when tapped on the base.
- Cool before slicing. Turn the loaves out of the tin and leave them to cool on a wire rack for at least 20 minutes before pulling apart or slicing. The steam inside the loaf continues to redistribute during this time, setting the crumb properly.
Chris’s Tips and Tricks
After watching Chris work through this recipe, a few key insights stand out for home bakers:
- Wet hands prevent sticking. When performing the stretch-and-fold in the bowl, keep your hands slightly damp. This stops the dough clinging to your fingers and makes the process much smoother.
- Sugar is optional but recommended. Adding the 2½ teaspoons of sugar has no effect on the flavour of the finished loaf — its sole purpose is to give the crust a deeper, more attractive golden colour. Worth including if you want that bakery-standard appearance.
- Don’t rush the prove. The final prove in the tin is crucial. The dough needs to reach the top of the tin before going in the oven — if you bake it too early, the loaf will be dense. Be patient and give it the time it needs.
- Cupped hands are your friend. When rolling the dough into a log during the initial shaping, cup your hands around the dough and use light pressure to create a tight, even surface. This tension helps the loaf hold its shape in the oven.
- Steam makes the difference. Adding steam to the oven at the start of baking keeps the crust soft and pliable during the first few minutes, allowing the loaf to expand fully before the crust sets. It results in a better rise and a lighter crumb.
- Flour on top is traditional. A classic turnover has a bit of flour on top — don’t skip the dusting before baking. It’s not just aesthetic; it’s part of what makes this bread instantly recognisable.
Watch the Video
Watch Chris from The Irish Baker Abroad demonstrate the shaping and technique for this classic Dublin loaf — particularly the turnover fold and the finger-poking stage, which really benefit from seeing in action:
Serving Suggestions
Dublin Turnover Bread is one of the most versatile loaves you can make. Freshly baked and still slightly warm, it needs nothing more than a generous spread of Kerrygold Irish butter and perhaps a little sea salt. The soft, open crumb makes it ideal for sandwiches, and it pairs beautifully with a bowl of Beef and Guinness Stew on a chilly evening.
For an authentic Dublin experience, tear the sections apart at the table rather than slicing — the finger-poke divisions were designed for exactly this purpose. The bread also freezes exceptionally well: wrap the loaves tightly once cooled and freeze for up to three months. Simply thaw overnight at room temperature or warm briefly in the oven before serving.
Frequently Asked Questions
What is the difference between Dublin Turnover Bread and a batch loaf?
Both are Irish white tin loaves with a soft crumb, but there are key differences in shape and texture. A batch loaf is baked in close contact with neighbouring loaves in a large batch tin, meaning the sides remain soft and pale. Dublin Turnover Bread, by contrast, is shaped using a specific folding and poking technique that creates the characteristic indented sections on top. The crust on a turnover tends to be slightly crisper due to the steam method and the floury top.
Can I use plain flour instead of strong bread flour?
Strong bread flour is recommended for this recipe. It has a higher protein content than plain (all-purpose) flour, which means it develops more gluten — essential for a well-structured yeasted loaf. Using plain flour will result in a denser loaf that may not rise as well. If strong bread flour is unavailable, you can substitute with 00 flour, though the texture will differ slightly.
Can I halve the recipe to make just one loaf?
Yes, this recipe scales down easily. To make one loaf, use 233 ml water, 400 g strong flour, 4 g instant yeast, 1 teaspoon salt, 1 teaspoon sugar, and 20 g melted butter. The method remains exactly the same — you will simply have one shaped piece to place in a standard 2 lb loaf tin. The resting and proving times stay the same regardless of quantity.
How long does Dublin Turnover Bread keep fresh?
At room temperature, wrapped in a clean tea towel or stored in a bread bag, Dublin Turnover Bread will keep well for 2 to 3 days. Because it contains butter, it stays softer for longer than a leaner loaf. After 3 days, it makes excellent toast. Freezing is the best option if you want to keep the bread beyond this — slice it before freezing so you can take out individual pieces as needed.
A Classic Worth Bringing Back to the Home Kitchen
Dublin Turnover Bread is the kind of recipe that connects you to something real — the smell of bakeries on a quiet city morning, the pleasure of tearing warm bread at the table, the simple satisfaction of making something from scratch. Chris from The Irish Baker Abroad has done a wonderful job of preserving that tradition in an approachable, modern format that home bakers of every level can follow.
If this has inspired you to explore more Irish baking, take a look at our full guide on making traditional Irish soda bread, or dive into one of Chris’s other celebrated recipes like his Millionaire Shortbread or his showstopping Chocolate Guinness Cake. Irish baking at its very best.
☘️ You Might Also Love
64,000 Ireland lovers can’t be wrong.
Every week, our free newsletter delivers hidden gems, seasonal guides, local stories, and practical travel tips — straight to your inbox. Join the community that loves Ireland as much as you do.
FREE GUIDE: 25 Hidden Gems of Ireland That Most Tourists Never Find (PDF)
☘️ Get More Irish Recipes & Stories
Join 64,000+ readers for weekly Irish recipes, food traditions, travel guides, and hidden gems. Free every morning.
📥 Free Download: Ireland Travel Planning Guide
Our most popular resource — itineraries, insider tips, and the 50 places you must not miss.
Tours & experiences you might love


Powered by Viator. Some links are affiliate links — we may earn a small commission at no extra cost to you.
Secure Your Dream Irish Experience Before It’s Gone!
Planning a trip to Ireland? Don’t let sold-out tours or packed attractions spoil your journey. Iconic experiences like visiting the Cliffs of Moher, exploring the Rock of Cashel, or enjoying a guided walk through Ireland’s ancient past often sell out quickly—especially during peak travel seasons.

Booking in advance guarantees your place and ensures you can fully immerse yourself in the rich culture and breathtaking scenery without stress or disappointment. You’ll also free up time to explore Ireland’s hidden gems and savour those authentic moments that make your trip truly special.
Make the most of your journey—start planning today and secure those must-do experiences before they’re gone!