

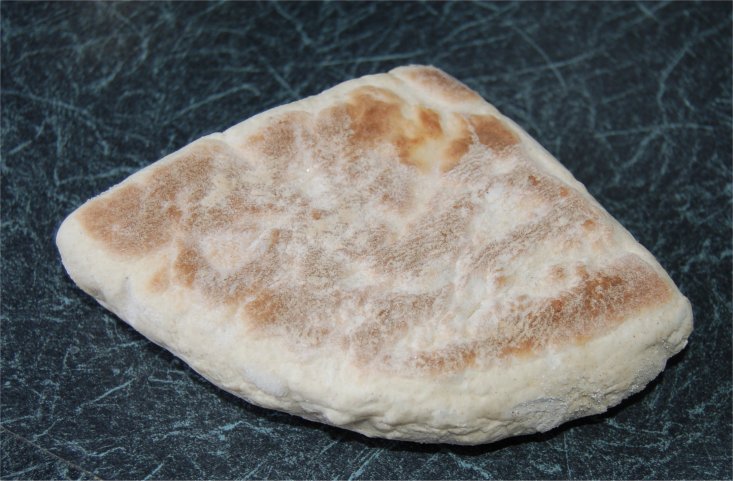
Soda Farl Recipe: The Soft Griddle Bread at the Heart of the Ulster Fry
If you have ever sat down to a proper Ulster fry in a Northern Irish café or farmhouse kitchen, you will almost certainly have encountered the soda farl — a soft, slightly tangy, floury square of soda bread cooked flat on a griddle rather than baked in the oven. While soda bread loaves are beloved across the whole island of Ireland, the farl is a distinctly Ulster tradition, and in counties like Antrim, Down, Tyrone and Armagh it is as essential to the breakfast plate as the sausage or the egg. The word farl comes from the Scots fardel, meaning a fourth part, which tells you exactly how the bread is made: a round of dough is cut into four triangular quarters before being cooked on a hot iron griddle.
Soda bread itself only became widespread in Ireland after bicarbonate of soda arrived in the 1840s, giving home bakers a reliable and affordable leavening agent that needed no yeast, no proving time, and no great equipment. In Ulster, where the griddle had long been used over open hearth fires, cooks quickly adapted the new soda dough to cook it flat and fast rather than in a pot oven. The result was a bread that could be on the breakfast table in under twenty minutes from start to finish — something that remains one of its greatest charms to this day. Soda farls were practical, economical, and deeply satisfying, and they have never gone out of fashion.
What makes a soda farl different from its oven-baked cousin is the texture: the outside develops a pale, lightly floury crust with a gentle bite, while the inside stays pillowy and moist, with that characteristic slight sourness from the buttermilk and bread soda working together. Eaten fresh from the griddle, split open and spread with salted butter, it is one of the great simple pleasures of Irish food. Tucked into a fry alongside bacon and a fried egg, it becomes something close to perfection. This recipe is as traditional as it gets — no extras, no shortcuts, just the real thing.
Ingredients
- 225g (8oz / 1¾ cups) plain white flour, plus extra for dusting
- ½ teaspoon bicarbonate of soda (bread soda)
- ½ teaspoon fine salt
- 175ml (6fl oz / ¾ cup) buttermilk, at room temperature
Method
- Place a flat griddle pan or a large heavy-based frying pan over a medium-low heat and allow it to heat up gradually while you prepare the dough. The pan should be hot but not smoking — a moderate, even heat is essential for cooking the farls through without burning the outside.
- Sift the flour, bicarbonate of soda and salt into a large mixing bowl and stir together briefly to combine evenly.
- Make a well in the centre and pour in the buttermilk. Using a round-bladed knife or your hand, bring the mixture together into a soft, slightly sticky dough. Work it as little as possible — just enough to combine. Overworking soda bread dough will make it tough.
- Turn the dough out onto a lightly floured surface and gently shape it into a round disc approximately 20cm (8 inches) in diameter and around 1cm (½ inch) thick. Do not roll it aggressively; pat it gently with floured hands instead.
- Using a large sharp knife or a dough scraper, cut the round into four equal quarters (farls) with two cuts through the centre, making a cross shape.
- Dust the griddle or pan very lightly with flour — just a fine coating shaken on from your hand. Place the four farls onto the griddle, leaving a little space between them.
- Cook the farls for approximately 8–10 minutes on the first side, until the underside is a pale golden colour with a lightly dry, floury appearance. They should feel firm enough to turn without collapsing.
- Flip each farl carefully and cook for a further 8–10 minutes on the second side. The farls are ready when both sides are evenly coloured and the bread sounds hollow when tapped on the base. The internal temperature should reach around 90°C (195°F) if you are using a probe thermometer.
- Remove from the griddle and stand the farls upright against each other to cool slightly, which allows any steam to escape and keeps the sides from going soft. Eat as fresh as possible.
Tips
- If you do not have buttermilk, stir one tablespoon of white wine vinegar or lemon juice into 175ml of whole milk and leave it to sit for five minutes — it will curdle slightly and work just as well.
- Keep the heat moderate throughout. Too high and the outside will colour and harden before the dough cooks through; too low and the farls will be pale and doughy inside.
- Soda farls are best eaten on the day they are made, ideally still warm. They are wonderful split open and fried cut-side down in a little butter or bacon fat for a minute or two when reheating the following morning.
- Do not be tempted to add extra flour if the dough feels slightly sticky — a soft, shaggy dough gives a better, lighter result than a stiff one.
There is something quietly wonderful about a bread this old, this simple, and this good — a recipe that has changed almost nothing in nearly two centuries because there is simply no need to change it. Whether you make soda farls as part of a full Ulster fry for a special weekend breakfast, or simply toast them and eat them with butter and a strong cup of tea on a grey morning, they have an honest, homely warmth that feels like a direct connection to Irish kitchen tradition at its very best. Once you have made them yourself, fresh and fragrant from the griddle, you will understand exactly why they have endured so long. If you would like to try the potato-based version of this griddle bread, see our potato farl recipe, or for a simpler four-ingredient take on this same soda farl, see Chris’s Irish Soda Farls.
☘️ Join 64,000+ Ireland Lovers
Every weekday morning, get Ireland’s hidden gems, local secrets, and travel inspiration — the kind you won’t find in any guidebook.
Subscribe free — enter your email:
📲 Know someone who’d love this? Share on WhatsApp →
Love more? Join 43,000 Scotland lovers → · Join 29,000 Italy lovers → · Join 7,000 France lovers →
Free forever · Unsubscribe anytime
Tours & experiences you might love


Powered by Viator. Some links are affiliate links — we may earn a small commission at no extra cost to you.
Secure Your Dream Irish Experience Before It’s Gone!
Planning a trip to Ireland? Don’t let sold-out tours or packed attractions spoil your journey. Iconic experiences like visiting the Cliffs of Moher, exploring the Rock of Cashel, or enjoying a guided walk through Ireland’s ancient past often sell out quickly—especially during peak travel seasons.

Booking in advance guarantees your place and ensures you can fully immerse yourself in the rich culture and breathtaking scenery without stress or disappointment. You’ll also free up time to explore Ireland’s hidden gems and savour those authentic moments that make your trip truly special.
Make the most of your journey—start planning today and secure those must-do experiences before they’re gone!